

Guide
Add a network
In the dashboardDevice registrationHow guests find & join
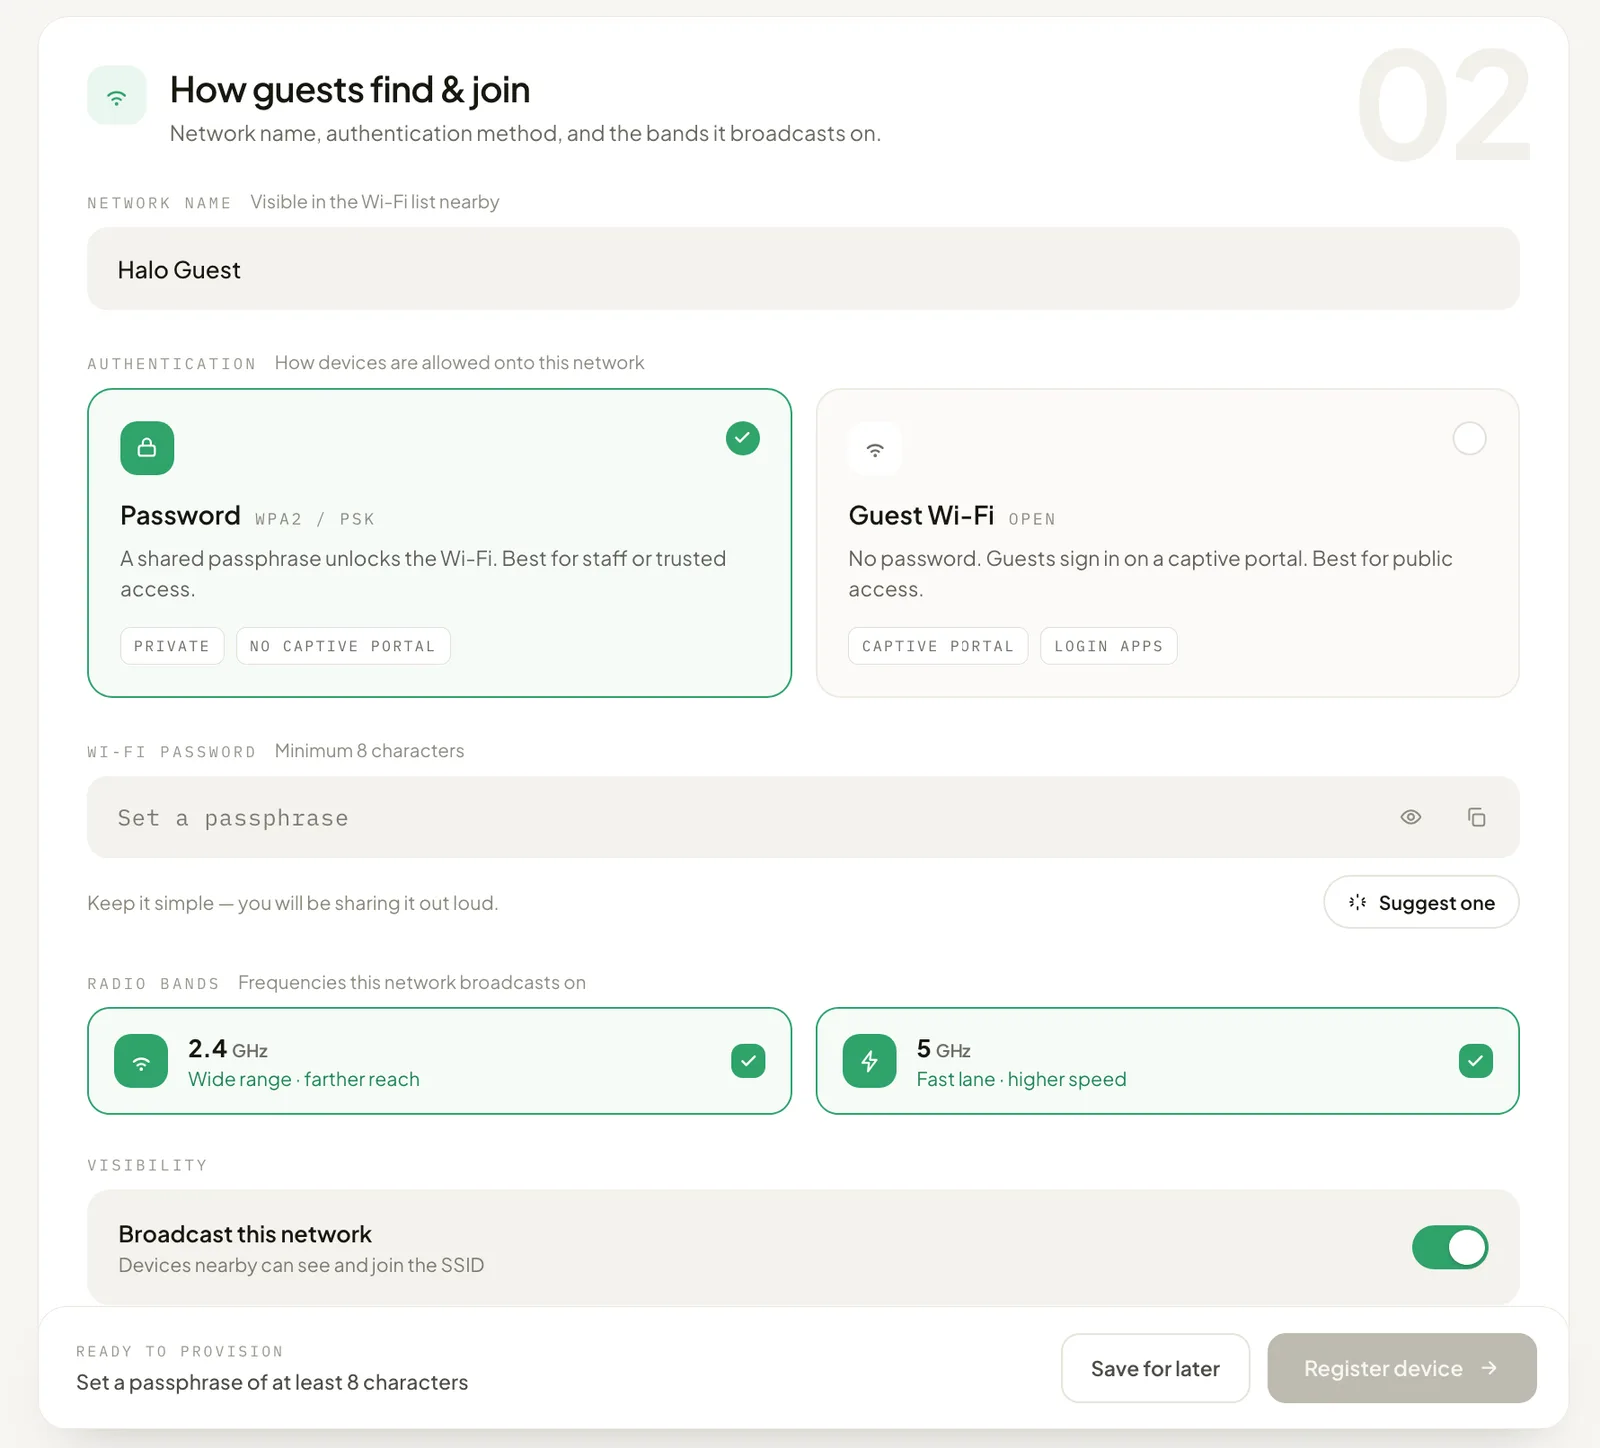
A network is the SSID guests see, the way they are allowed onto it, and the bands it goes out on. Registration asks for one so the access point has something to broadcast the moment it provisions; the same card is edited afterwards on the location, under SSID configuration.
Network name
Section titled “Network name”The name is the SSID nearby devices list. Use the venue’s public name rather than an internal code, since it is the string a guest has to recognise.
Password or Guest Wi-Fi
Section titled “Password or Guest Wi-Fi”Password is WPA2 with a pre-shared key of at least eight characters, set on this screen. The network is private and shows no portal. A “Suggest one” button generates a passphrase, and reveal and copy buttons sit in the field. “Register device” stays disabled until the passphrase is long enough.
Guest Wi-Fi is open at the radio layer, so there is no passphrase. Choosing it replaces the password field with a guest login app picker, and that choice is required: the network has no way to admit anyone until one is selected. Which app to pick, and what each asks a guest for, is on Choose a login app.
Radio bands and visibility
Section titled “Radio bands and visibility”Both bands are on by default and at least one has to stay on; what each band is good for is on SSID configuration. “Broadcast this network” is on by default. Turn it off for a hidden network, one that devices have to be told the name of.
What is not asked here
Section titled “What is not asked here”Channel, width and transmit power are radio settings, set per device after registration on Band configuration. The redirect and portal ads are network cards on the location, reached once the unit is registered.
Notes
- Everything on this card can be edited later on the location, under SSID configuration.
- At least one radio band has to stay on.